Decide whether you need a crop or a mask
“Blur part of the screen” can describe two different outcomes. A crop sends only the selected rectangle. A mask keeps the wider scene visible but covers one stable area inside a separate audience output.
| Need | Better tool | Main limitation |
|---|---|---|
| Show only one rectangular region | Zoom Portion of screen | Content outside the green frame is not shared at all |
| Show only one app | Native app-window share | Sensitive content inside that app remains visible |
| Keep the full workflow but cover a fixed sidebar, badge, or overlay | ScreenK9 fixed privacy zone | The zone does not follow moving content |
| Hide a person, word, or field wherever it moves | Redact the source or use purpose-built tracking | A fixed rectangle is not safe for moving targets |
Start with exclusion. Sharing less is easier to verify than hiding more.
Crop the share with Zoom's Portion of screen
Zoom's current desktop documentation lists Portion of screen under its advanced share types. The audience receives the area inside an adjustable green border, not a blurred version of the surrounding desktop.
- In the Zoom desktop app, click Share Screen.
- Open the advanced share choices.
- Select Portion of screen.
- Move and resize the green frame around the material.
- Start sharing and watch the receiver's view.
- Resize or move the frame before sensitive content crosses its edge.
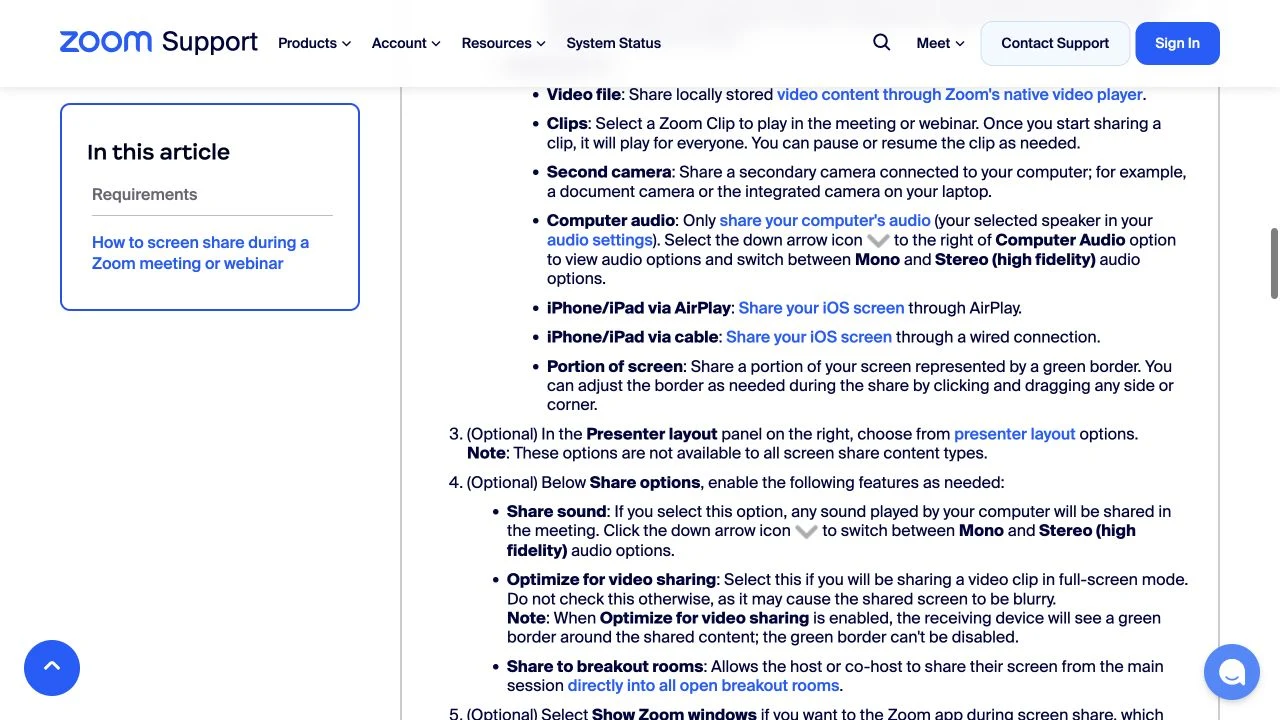
Zoom Support, captured September 8, 2026 at double the article display width. The Zoom branding and highlighted Portion of screen entry remain visible in the source frame.
The crop is useful for a stable dashboard panel or a single simulator. It is fragile when the window moves, a menu opens outside the frame, or the presenter needs several apps. Also verify whether shared computer audio is appropriate: audio can reveal private material even when pixels are outside the crop.
Zoom also supports sharing one application window or multiple applications on supported desktop versions. Use those native options when they describe the task more accurately than a rectangle.
Do not confuse a fixed mask with automatic redaction
A visual cover is reliable only when its geometry matches the content throughout the presentation. It does not understand names, faces, email addresses, notifications, or credit-card fields.
Before choosing a fixed area, ask:
- Does the sensitive element stay in the same place after resizing?
- Can the page scroll beneath it?
- Can browser zoom, responsive layout, or a sidebar move it?
- Will another monitor or display scale change the coordinates?
- Could a menu, tooltip, or modal appear outside the covered area?
If any answer is uncertain, remove the sensitive data at its source, use a dedicated demo account, or share a narrower surface. Browser extensions that blur elements on a webpage affect that webpage; they do not automatically cover native Mac apps, system dialogs, or other windows.
Cover one stable area in ScreenK9 Audience View
ScreenK9 calls this Hide a fixed part of the screen. It is a manual privacy zone in the filtered Audience View—not OCR, face tracking, or semantic detection.
- Create or select the privacy profile for the call.
- Under Hide a fixed part of the screen, add an area.
- Drag the rectangle over the stable sensitive region.
- Name the area so you can identify it before the next session.
- Move or redraw the zone if the source layout changes.
- Start ScreenK9 and keep ScreenK9 — Audience View visible for verification.
- Share that named window in Zoom, Meet, Teams, Loom, or OBS.
The rectangle covers the corresponding fixed region in Audience View while your original workspace remains unchanged. The word “blur” is often used for this goal, but the privacy property is the cover: the underlying pixels are not shown in the audience composition.
ScreenK9 uses Apple's public ScreenCaptureKit APIs and performs the composition locally. It does not modify Zoom or capture traffic from a meeting service. The ScreenK9 privacy model explains the local boundary.
There is one non-negotiable share-target check: select ScreenK9 — Audience View, not the physical display. Sharing the display sends the display directly and bypasses the filtered window.
Test the geometry that can break the cover
A fixed-area mask should be tested against the exact display setup used for the call.
| Change during the call | What can go wrong | Safer response |
|---|---|---|
| Resize or maximize the source window | Sensitive content moves outside the zone | Lock the layout or redraw and retest |
| Scroll the page | A private row enters an uncovered area | Redact the source or crop the share |
| Change browser zoom | Columns and account controls shift | Keep zoom fixed for the session |
| Move between displays | Scale and geometry can change | Test on the destination display |
| Open a modal or tooltip | New private content appears elsewhere | Exercise every planned interaction |
| Switch apps | The same coordinates cover a different object | Use app allowlisting as the first boundary |
For cross-app calls, combine the zone with an Allow only profile so unapproved apps never enter Audience View. The guide to sharing multiple apps without the entire screen explains that workflow. If pop-up banners are the real problem, use the separate guide to hiding notifications while screen sharing on Mac.
Run a receiver-side reveal test
Use a private meeting, second device, or local recording. Do not rely only on the presenter's preview.
- Place harmless test text inside the intended sensitive region.
- Confirm that Audience View covers it completely at rest.
- Resize, scroll, and change zoom exactly as the real demo requires.
- Open every planned menu, tooltip, file picker, and modal.
- Move the source window a few pixels, then restore it.
- Switch away and back to every approved app.
- Confirm the receiver never sees the test text in any transition frame.
If the test text appears once, the setup is not ready. Narrow the share, remove the data, or simplify the layout until the result is stable.
The practical rule is: crop when the audience needs one region; mask only a fixed, rehearsed area; remove or replace sensitive data when it can move. ScreenK9 is available for Apple silicon Macs running macOS 14+.
Sources checked
- Zoom Support: Sharing your screen or desktop
- Zoom: How to Share Your Screen with Video and Audio (video)
- Google Meet Help: Present during a video meeting
- Apple Developer Documentation: Capturing screen content in macOS
Zoom's current support page, the official branded video, and ScreenK9 v0.3.4 fixed-zone behavior were rechecked on September 8, 2026.