
Start with the built-in window recorder
For one spreadsheet, browser window, or app tutorial, check the macOS version before installing anything. Apple’s current screen-recording instructions explicitly list Record Selected Window for macOS Tahoe 26 or later. Older tutorials may show only entire-screen and selected-portion recording.
Open the content you want to demonstrate, then:
- Press Shift–Command–5 to open Screenshot.
- Select Record Selected Window, checking that you chose a video control rather than a still screenshot.
- Review Options, including the microphone and save location.
- Click the intended window to begin.
- Finish with Command–Control–Esc, then play the saved clip.
QuickTime Player’s File → New Screen Recording can open those same Screenshot controls. It is another entry point, not a separate way to add a missing capture mode to an older operating system. Apple also notes that some protected app content cannot be recorded.
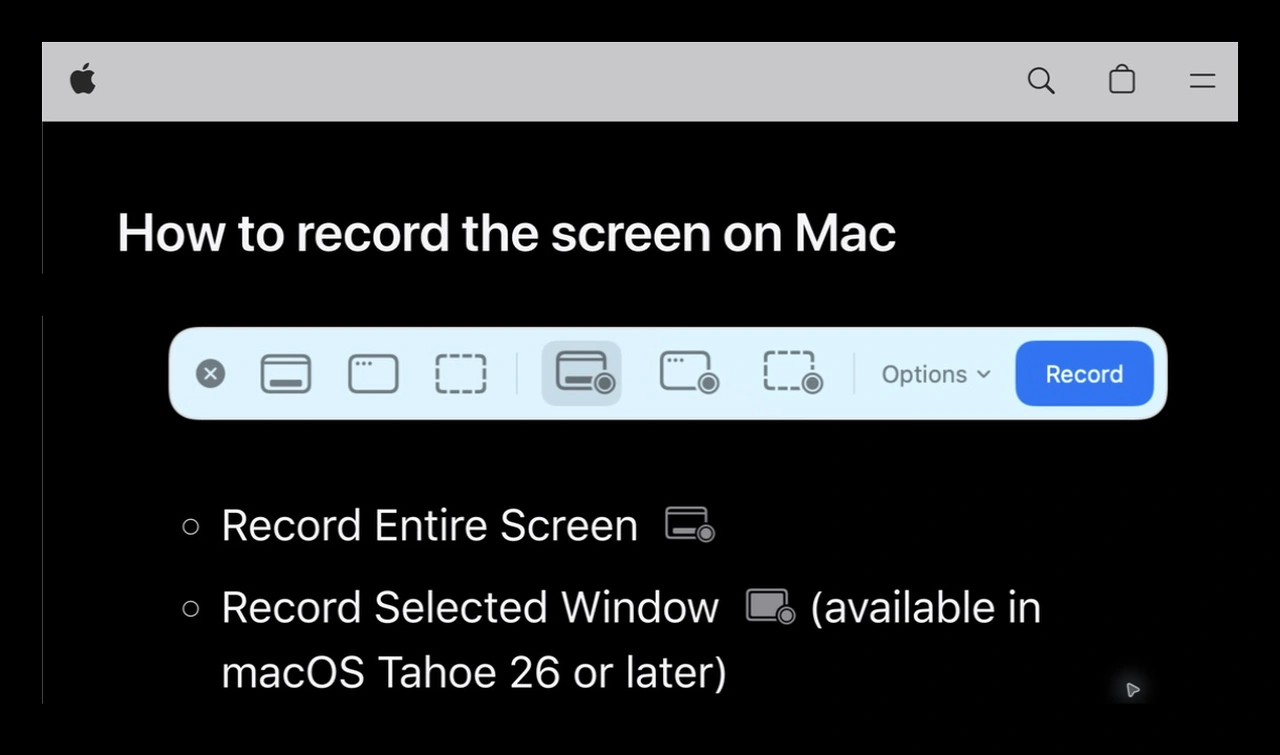
Cropped excerpts from Apple Support, captured September 13, 2026. The source identity and selected-window version requirement are retained; intervening page content is omitted.
Choose a window, a region, or a filtered work view
These choices can look similar in a short recording. Their behavior matters when something changes halfway through a demonstration.
| Recording job | Simplest starting point |
|---|---|
| One window on Tahoe 26+ | Screenshot: Record Selected Window |
| One window on an older Mac | A recorder with true window capture |
| One stationary screen area | Record Selected Portion |
| A changing set of approved work apps | Record a tested ScreenK9 Audience View |
| Several independently arranged sources | Build a recorder scene |
A region is a rectangle on the display. If a message window moves into that rectangle, those pixels can become part of the recording. If your work window moves outside it, the recording may stop showing the useful content. A carefully drawn border is therefore a framing choice, not an application rule.
Window selection follows a different boundary: the selected source. Still check what happens when your task opens a separate dialog or another document. A tutorial that starts in a browser but finishes in a terminal no longer has the same one-window requirement.
Write down the sequence before choosing the mode: open dashboard, change one setting, inspect the result. If all three actions stay in one window, keep the native setup. If the sequence includes several applications, decide whether you want separate clips, a recorder scene, or one filtered audience source.
Use actual window capture on an older Mac
If Screenshot lacks the window-recording control, its selected-portion option remains useful for a stationary demonstration. Keep other content outside that rectangle and review the result. Do not assume the camera-shaped still-image window control records video.
For an isolated moving window, OBS offers a macOS Screen Capture source with distinct display, application, and window choices. Choose the window mode and the actual work window, then inspect the source preview before recording. Application capture and window capture are different choices here too. OBS documents this source for macOS 12.3 or later; check compatibility before installing it on an older system.
If the recorder’s canvas is larger than the source, adjust the source framing and output dimensions deliberately. Making the work window larger can improve text readability; capturing more of your desktop is not necessary just to make a document readable.
The OBS multi-window guide covers scenes with several sources. That setup is useful when each source needs its own position. The video above covers OBS recording and audio configuration, which is a separate decision from whether Screenshot can record one window.
When a recording needs to cross work applications
Consider a support walkthrough that opens a Work Chrome dashboard, a code editor, and a terminal. You want to explain the sequence while keeping personal messaging available locally. Recording your physical display expands the picture to everything that appears there.
ScreenK9 can create a separate filtered macOS window for that changing workflow. It supplies the picture; your recording application saves the video. ScreenK9 is not itself a recorder or an OBS scene editor.
Prepare the source in this order:
- Place the required work apps on the selected capture display.
- Create an Allow only profile and approve the applications used in the walkthrough.
- Classify the intended Chrome profiles as Work through the companion extension.
- Start capture and open ScreenK9 — Audience View.
- In Screenshot on Tahoe, or another window-capable recorder, select that exact audience window.
- Record the complete switching sequence with harmless sample content and inspect the saved file.
This workflow follows ScreenK9’s ordinary-window architecture. A particular recorder and macOS combination still needs a rehearsal; we have not run a receiver test for every combination. Keep Audience View open and available throughout the recording rather than relying on minimized-window behavior.
Check the application boundary before recording
ScreenK9’s rules for ordinary apps apply to the application, not individual windows inside it. Approving an editor may include another document from that editor. For a task that needs exactly one window from an otherwise private application, keep using the recorder’s own window selection.
Chrome has a separate local profile-classification path. Personal, unclassified, stale, and ambiguous matches are hidden. Title matching is not cryptographic identity. The Chrome profile privacy guide explains preparation and the limits of that distinction.
An approved app can still display private information within its content. Use demo records and inspect the visible file names, menus, and terminal history. ScreenK9 has no OCR or automatic secret detection. Its manual redaction regions cover fixed user-chosen areas; they do not identify or follow moving text.
Selecting the physical display directly in your recorder bypasses ScreenK9’s filtered output. Verify the source name after restarting a recording, reconnecting a display, or changing the recording application.
Review sound and the saved file separately
ScreenK9 does not capture or route audio. Hiding a messaging app from the picture does not stop its notification sound from reaching a microphone or a recorder’s system-audio source. Check those controls in the recorder and make a short listening test.
Apple’s capture permission settings apply to the apps doing the capture. Follow the permission prompts for your recorder and for ScreenK9 when used. Reopen the relevant app if macOS requests it, then repeat the test.
Before sharing the finished file, check its beginning and end as carefully as the main demonstration. Look for a source-selection transition, an unexpected dialog, or a private app introduced while stopping. For a browser-only tutorial, sharing one tab may solve the smaller task. For a walkthrough across apps, the current ScreenK9 download lists supported Macs.
Sources checked
- Apple: How to record the screen on Mac
- OBS: macOS Screen Capture source
- Apple: Screen and system audio recording permissions
Sources and ScreenK9’s implementation were checked September 13, 2026. The native window option is version-specific; the article does not promise unattended capture of minimized windows, protected video, or automatically detected secrets.